
How to Convert RAW to DNG in Dragonframe: Step-by-Step Guide

Are you working on a stop-motion project and need to convert RAW files into DNG for a smoother workflow and better compatibility? This guide will walk you through the entire process using Dragonframe and Adobe DNG Converter.
Step 1: Download and Install Adobe DNG Converter
- Visit the official Adobe website and download the latest version of Adobe DNG Converter.
- Follow the on-screen instructions to install the software.
Step 2: Export RAW Sequence in Dragonframe
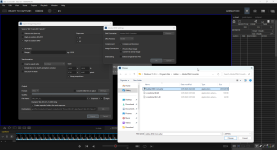
- Open your project in Dragonframe.
- Go to the Export option and select Export Sequence.
- In the Export Image Sequence window, choose High-resolution RAW.
- Under the Output section, select the DNG format, click on the Settings button, and specify the path to the Adobe DNG Converter file.
- Click OK, then press the Export button.
If you’re interested in learning more about stop-motion animation techniques, shooting tips, or post-production workflows, let me know in the comments! I’d be happy to create a tailored tutorial and add it to my future plans.